If like me you have several self hosted services, one challenge you may face is having a easy way to access them, this can be extra challenging if you have a single non fixed IP address.
One solution is to use nginx as a gateway to the services you are hosting and custom subdomains to manage access to them.
0. My setup
I have a raspberry pi (the “gateway”) running nginx, ports 80 and 443 are forwarded to my home internet router allowing me HTTPS access to the pi outside of the LAN network.
I have several Pi’s/PCs running various services (nextcloud, motion camera, home assistant etc) within my local network, these don’t have any port forwards to the internet, only the “gateway” Pi is exposed.
Important Make sure you change the default root password to any raspberry pi’s that are exposed to the internet!
1. Setting up Dynamic DNS
My ISP does not provide fixed IP addresses to residential customers, so in order to keep track of my networks IP address I am using freedns.afraid.org as a Dynamic DNS provider.
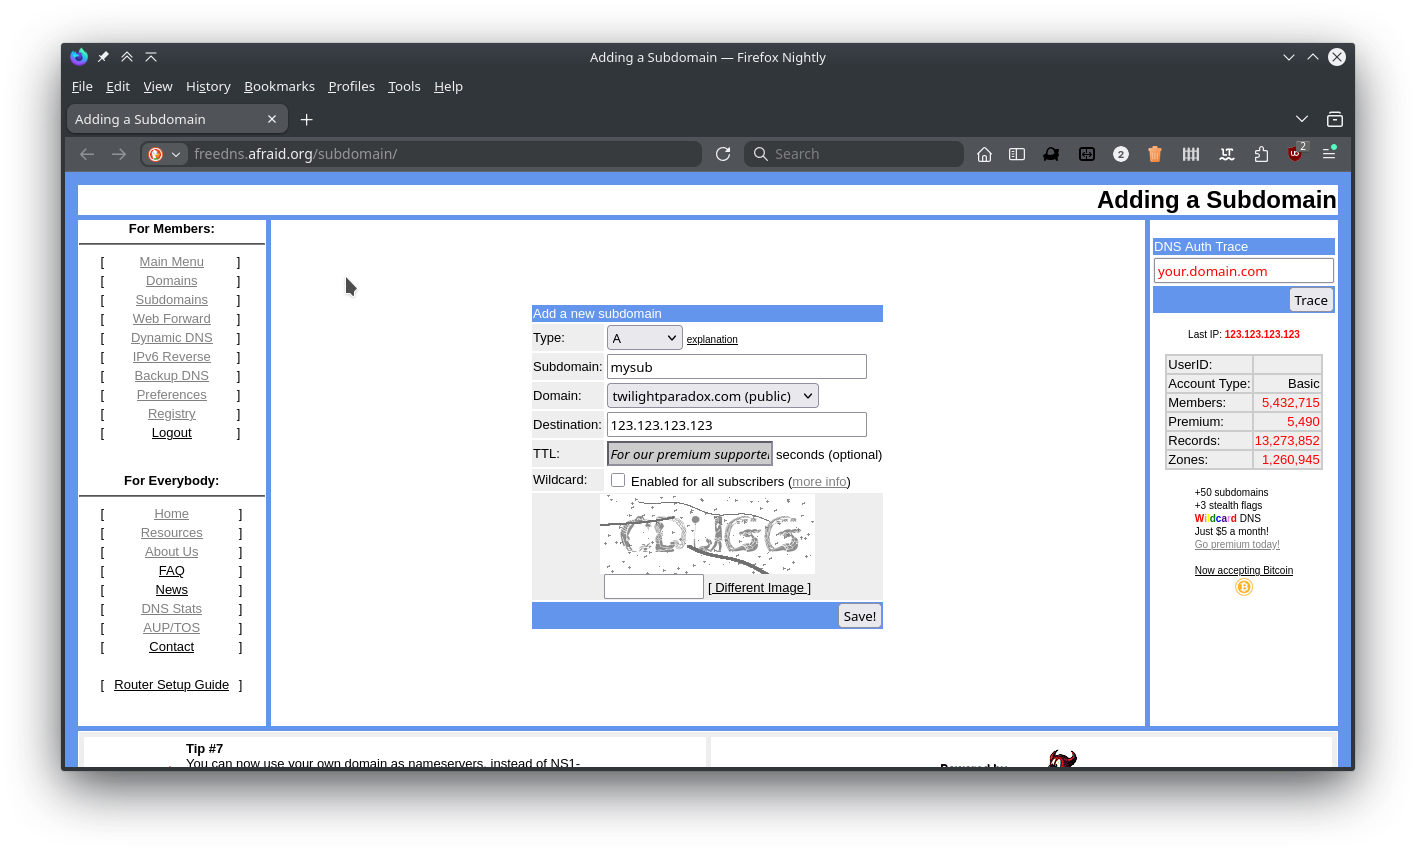
The first step is to create a subdomain with one of their domains, setting the destination as my public IP address.
Next I need to keep the dynamic DNS updated with my networks IP.
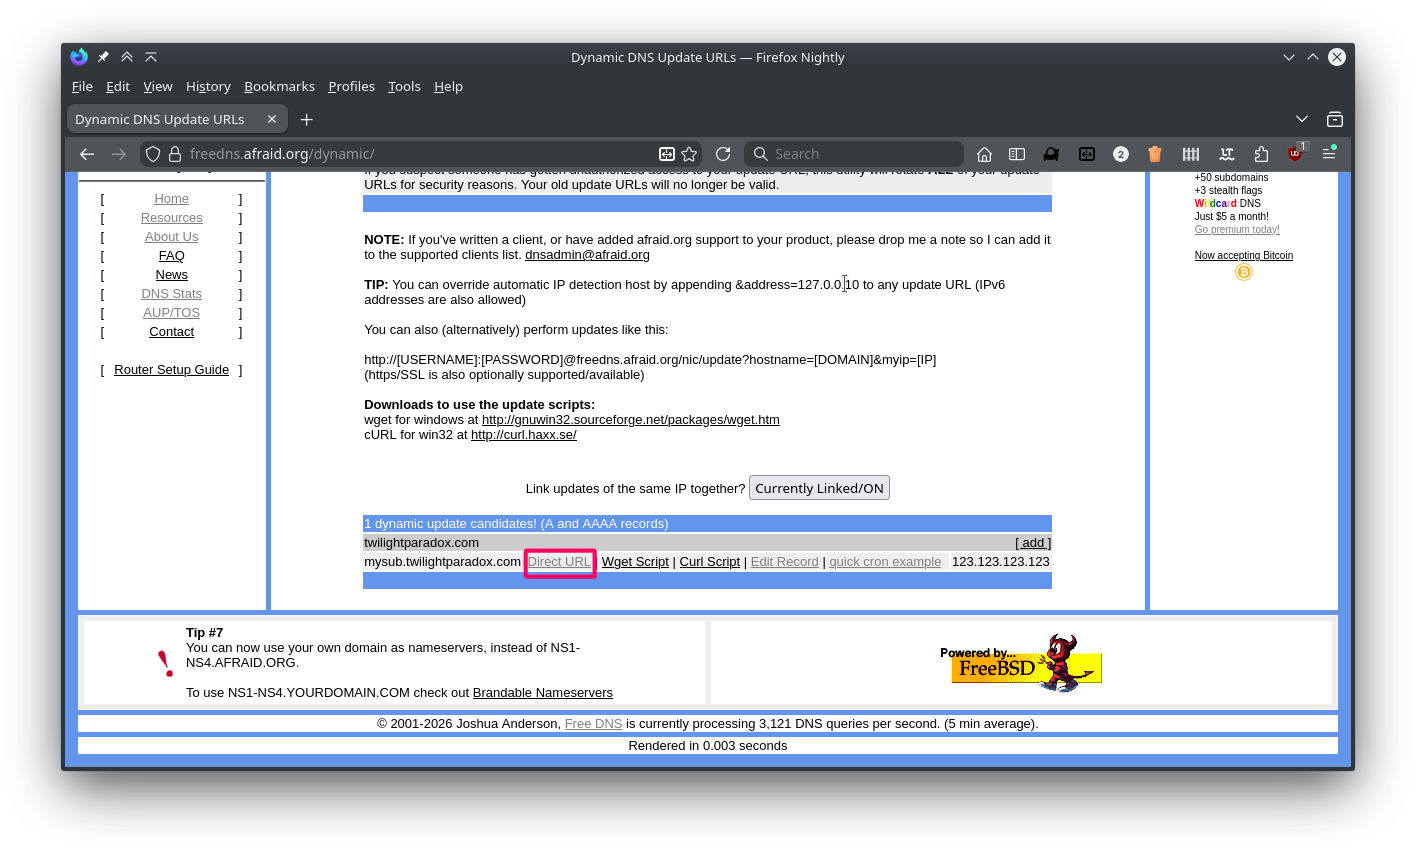
Freedns provides a unique link for each DNS record, HTTP GET requests to the link will update the records destination IP with the IP that performed the GET request.
The update link for our Dynamic DNS subdomain can be found under the Dynamic DNS section of freedns.afraid.org.
Important Keep this link private as anyone with it will be able to change the IP address of your DNS record!
After getting the update link I created a cron job on the gateway that uses cURL to periodically perform HTTP get requests to the update link.
If my IP address changes, then the cron job will update the DNS record with the new IP. For debugging I setup the script to output the response from the update link to a file, this is not necessary but useful to monitor changes to the IP and make sure it is being updated correctly.
curl https://freedns.afraid.org/dynamic/update.php?TOKEN > /home/jack/cron/log/ip-update/$(date '+%Y-%m-%d_%H-%M-%S')
2. Setting up custom subdomains
I have a domain registered with 123-reg.co.uk which I setup subdomains on to access my self-hosted services.
I created a CNAME record (named selfhost) which points to the dynamic DNS record (mysub.twilightparadox.com) setup in section 1
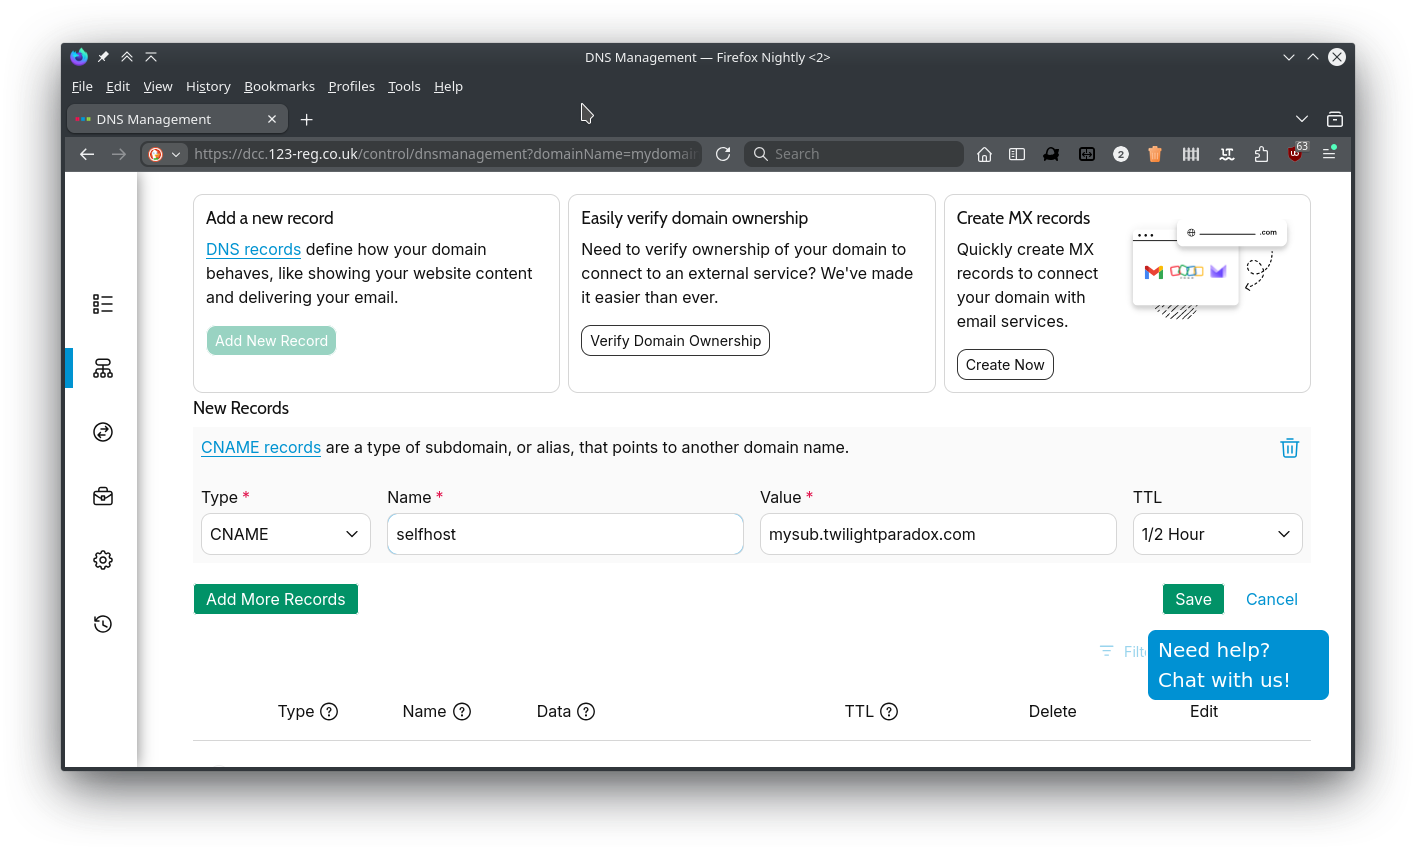
CNAME records act like an alias to another DNS record, so in my example selfhost.example.com resolves as mysub.twilightparadox.com which resolves as my networks public IP address. Which esentially means my subdomain selfhost.example.com resolves as my public IP
3. Setting up Nginx
Now we have a subdomain that points to our public IP we need to setup nginx on the gateway to receive incoming HTTP requests and to pass them onto the various self-hosted services
After installing nginx we need to create a configuration file for our service:
server{
	listen 80;
	server_name selfhost.example.com;
	resolver 192.168.0.1;
	location / {
		proxy_pass http://192.168.0.10:8080;
	}
}
This config uses proxy_pass, when nginx receives a request for selfhost.example.com it will pass the request to the ip/port in the location section. This IP can be on the same computer that is running nginx or a separate computer running on the local network.
Save the config to /etc/nginx/sites-available/selfhost.example.com
After saving the config file we need to enable the site, to do this we need to create a symbolic link of the configuration file in /etc/nginx/sites-enabled
sudo ln -s /etc/nginx/sites-available/nextcloud /etc/nginx/sites-enabled/
Then restart nginx
sudo systemctl restart nginx.service
Note My installation of nginx has sites-enabled included in nginx.conf by default, some distributions may not.
Make sure you have include /etc/nginx/sites-enabled/*; in /etc/nginx/nginx.conf
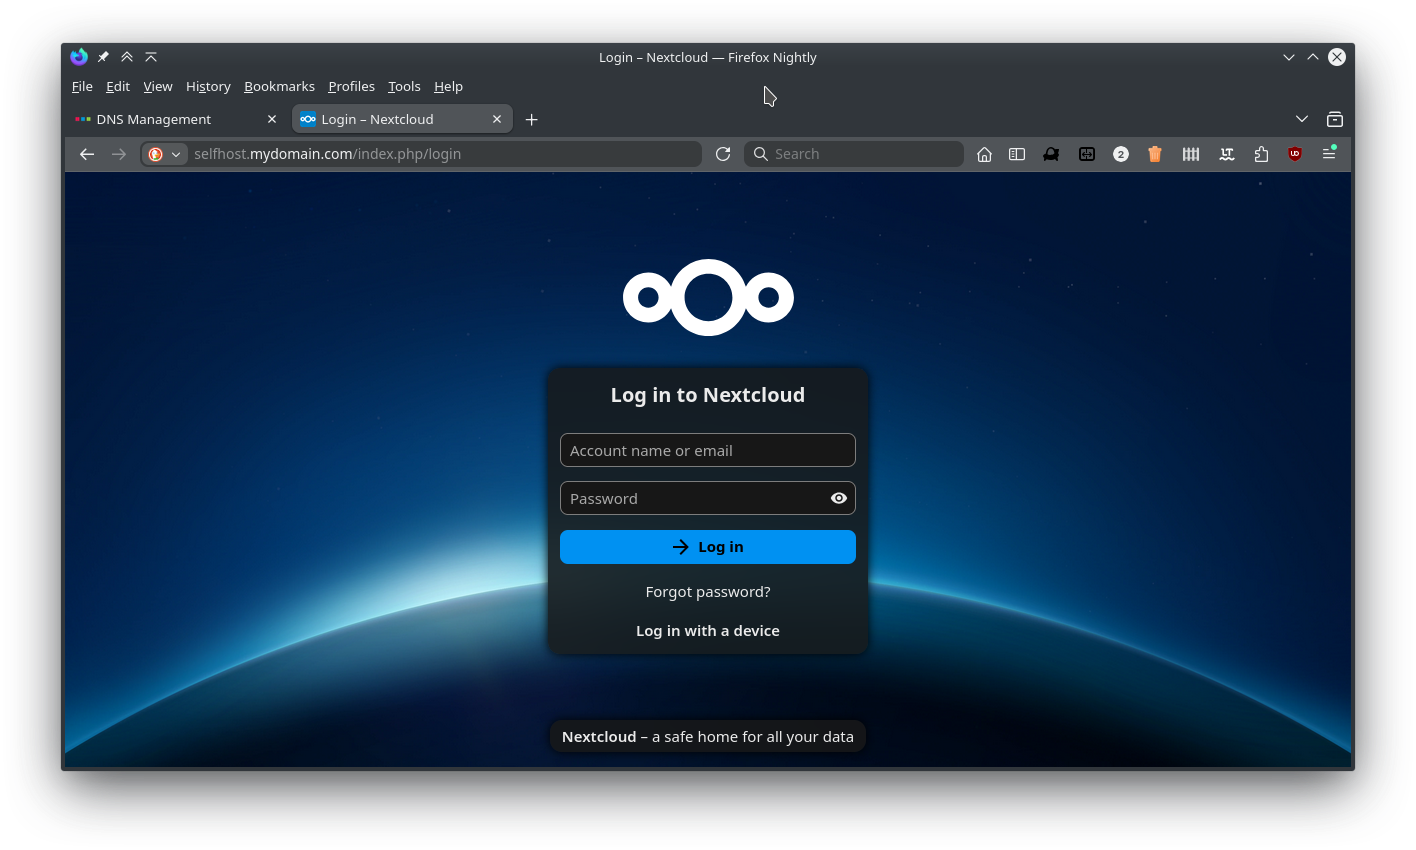
After restarting nginx you should be able to access the service proxy_pass is pointing to from the custom subdomain setup in section 2
You might find it doesn’t work immediately due DNS propagation delays, it can take time for changes to the DNS records to be updated across all DNS servers worldwide
To setup more services, you will need to create a custom subdomain that points to the dynamic DNS record setup in section 1, then create a new config file for nginx for the new subdomain.
For example say I have home-assistant running on a Pi with the local address 192.168.0.11, I could create a subdomain named ha that has the value mysub.twilightparadox.com then create the following nginx config
server{
	listen 80;
	server_name ha.example.com;
	resolver 192.168.0.1;
	location / {
		proxy_pass http://192.168.0.11:80;
	}
}
When nginx sees a request for ha.example.com it passes it to the address 192.168.0.11 port 80.
4. Setting up SSL/TLS
After confirming nginx and the subdomains are working we will need to setup SSL certificates to enable HTTPS
To do this we can use Certbot to create SSL certificates and update nginx to use them
Install Certbot and certbot nginx utility:
sudo apt-get install certbot python3-certbot-nginx
After installing certbot, we can run the following command to get a certificate for our selected subdomain and have certbot update the nginx configuration
sudo certbot --nginx -d selfhost.example.com
After running certbot /etc/nginx/sites-available/selfhost.example.com should have been updated:
server{
	server_name selfhost.example.com;
	location / {
		proxy_pass http://192.168.0.10:8080;
	}


    listen 443 ssl; # managed by Certbot
    ssl_certificate /etc/letsencrypt/live/selfhost.example.com/fullchain.pem; # managed by Certbot
    ssl_certificate_key /etc/letsencrypt/live/selfhost.example.com/privkey.pem; # managed by Certbot
    include /etc/letsencrypt/options-ssl-nginx.conf; # managed by Certbot
    ssl_dhparam /etc/letsencrypt/ssl-dhparams.pem; # managed by Certbot

}

server{
    if ($host = selfhost.example.com) {
        return 301 https://$host$request_uri;
    } # managed by Certbot


	listen 80;
	server_name selfhost.example.com;
    return 404; # managed by Certbot
}
Restart nginx
sudo systemctl restart nginx.service
HTTPS should now be enabled on the subdomain, Verified by let’s encrypt.
Certificates are only valid for 90 days, certbot should create a cron job to auto renew the certificates. You can also manually renew them with sudo certbot renew